To create a database file containing members with email addresses, you will begin by copying the canned query that you can view in Tool # 519: Member with Email Addresses (PCMBRCFG).
- A Canned Query is a report that can be viewed on the screen that are accessed via several CU*BASE tools.
- Canned Queries are found in the CUBASEQ library
Steps to Copy the Canned Query
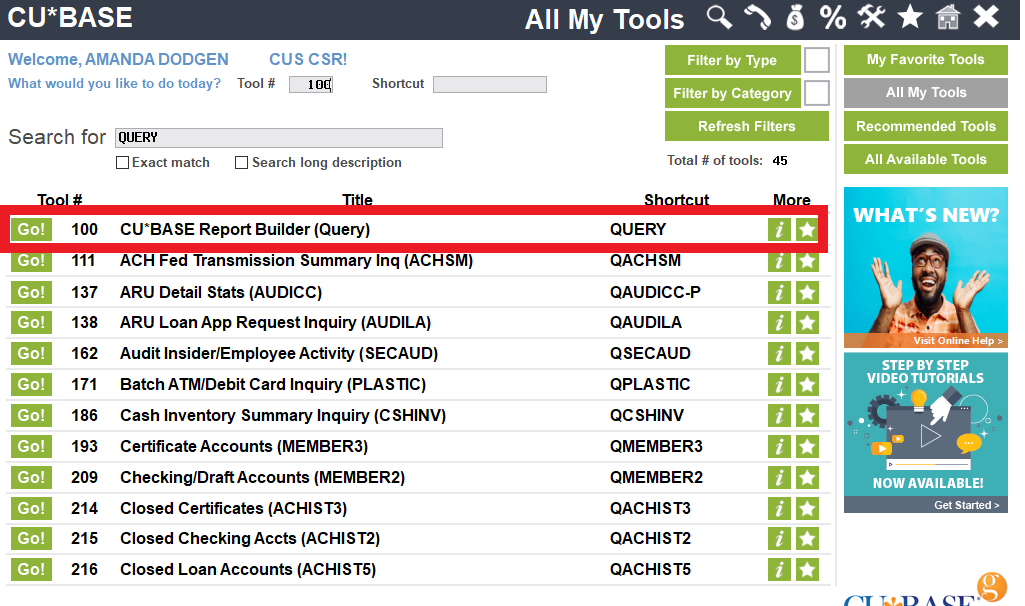
1. Launch Tool # 100: CU*BASE Report Builder (Query)
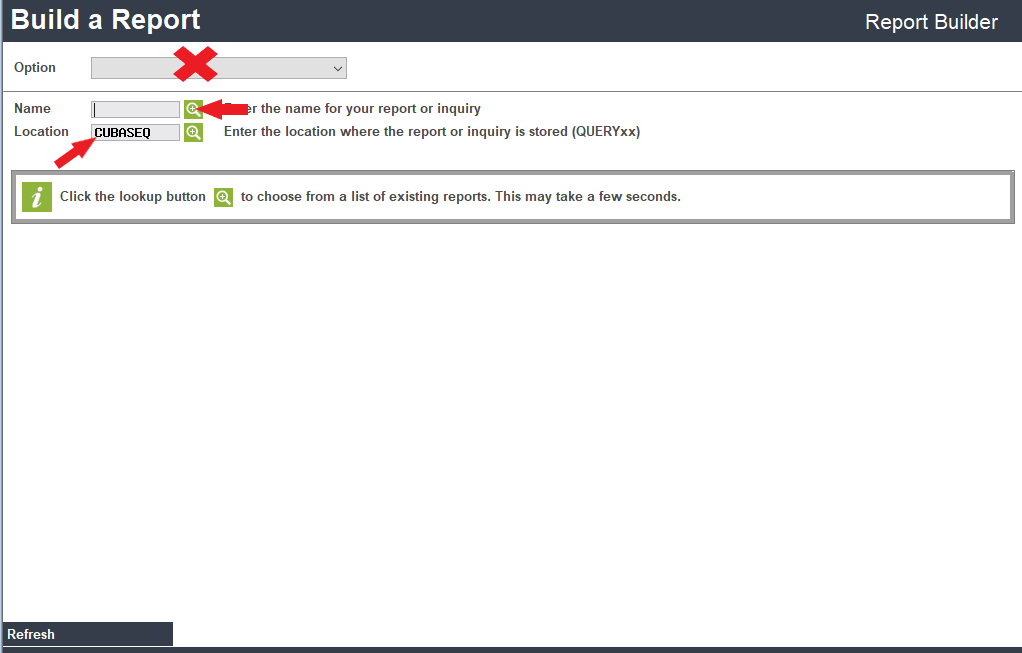
2. On the Build a Report screen, leave the Option field blank - do not select an option from the drop-down menu.
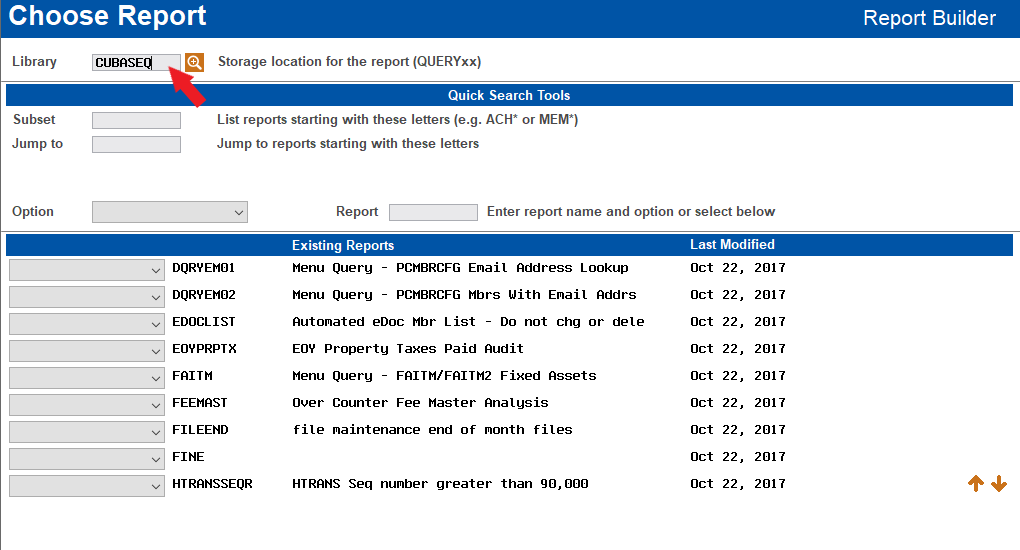
3. In the Location field, enter CUBASEQ
4. Click the spyglass next to the Name field
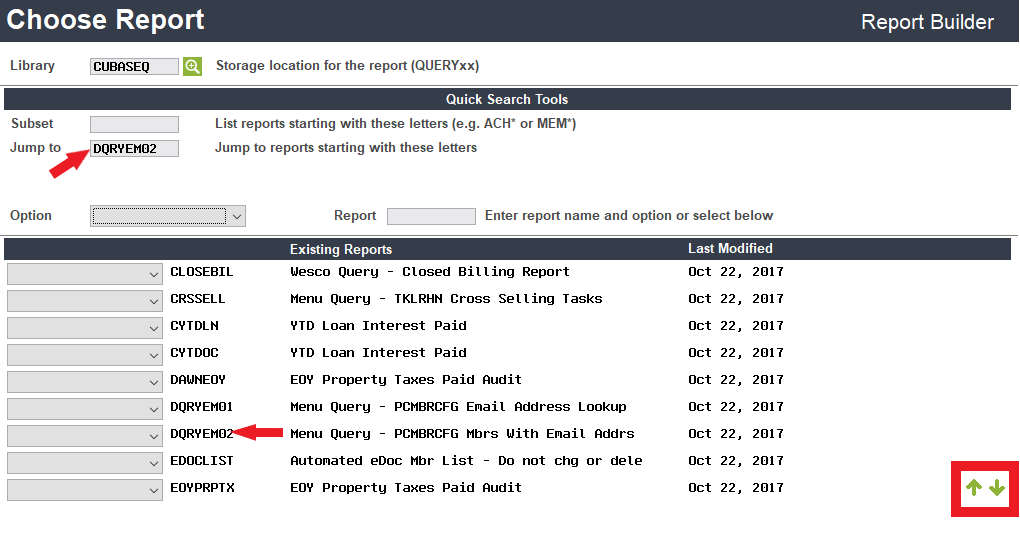
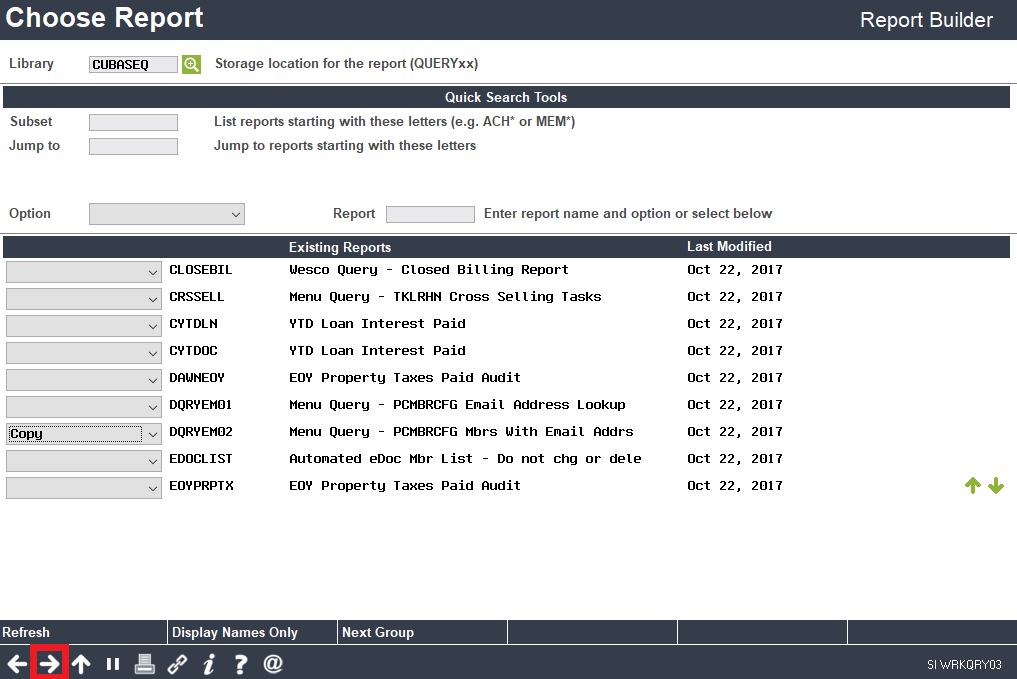
5. On the Choose Report screen, find the Query named DQRYEM02 (Menu Query - PCMBRCFG Mbrs With Email Addrs)
- You can scroll through the list to find the Query by using the up/down arrows or enter the Query name in the Jump to field
6. Using the drop-down menu beside the name of the Query, select 'Copy'
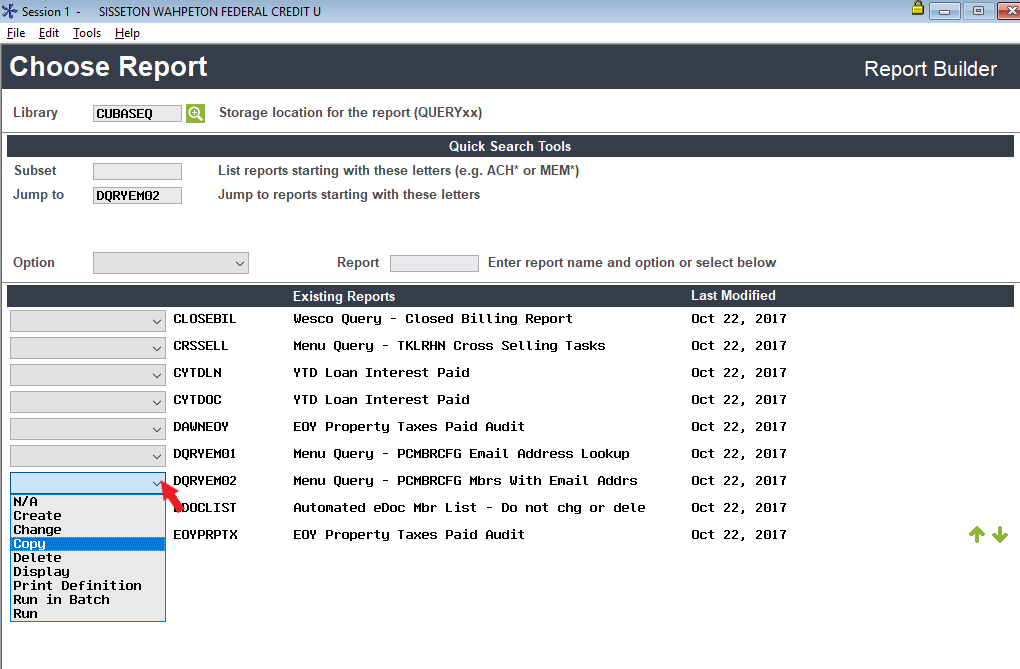
7. Click the forward arrow
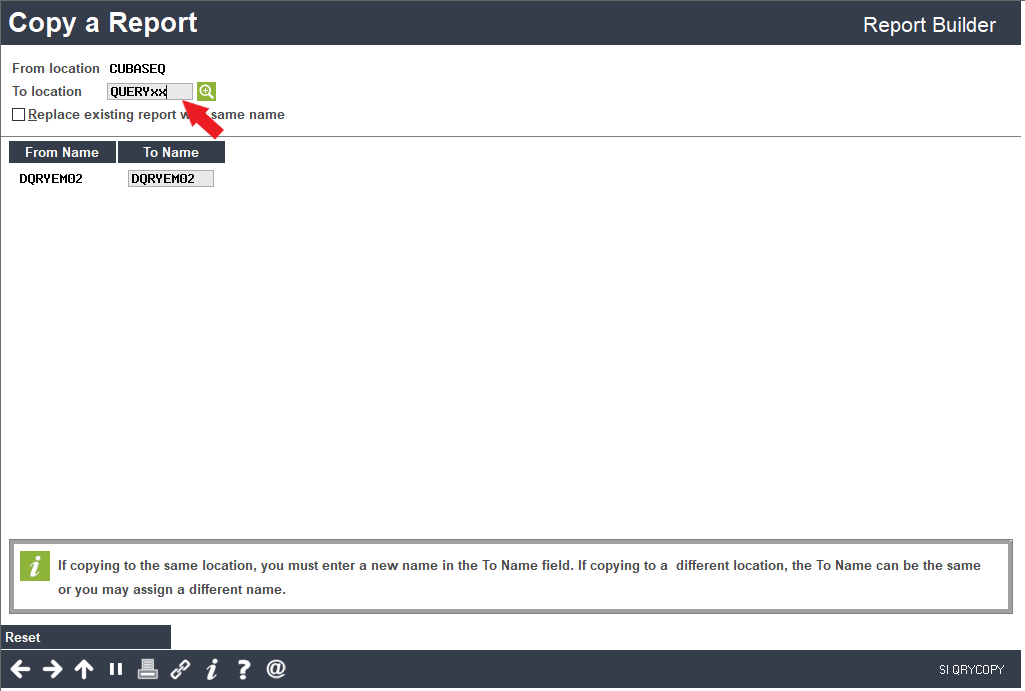
8. On the Copy a Report screen,in the To location field, enter the location where you would like your Query moved to (QUERYxx)
- In place of the xx, substitute your credit union's two-character CU ID
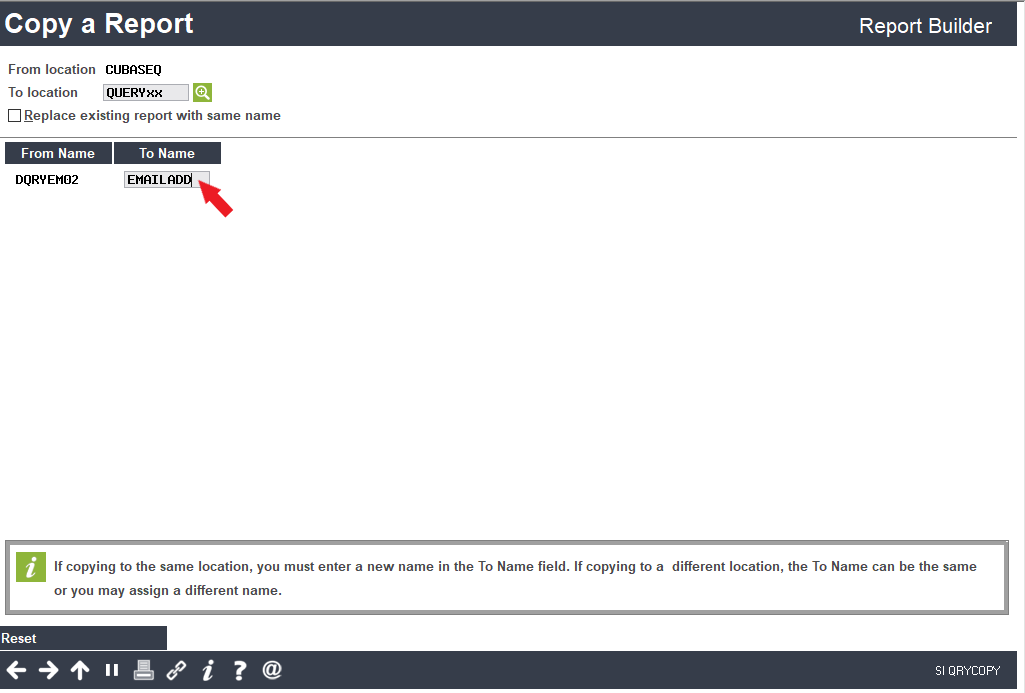
9. If you would like to rename the Query, enter the new Query name in the To name field (this step is optional)
- Only check the Replace existing report with same name box if you wish to overwrite a Query with the same name in your QUERYxx library
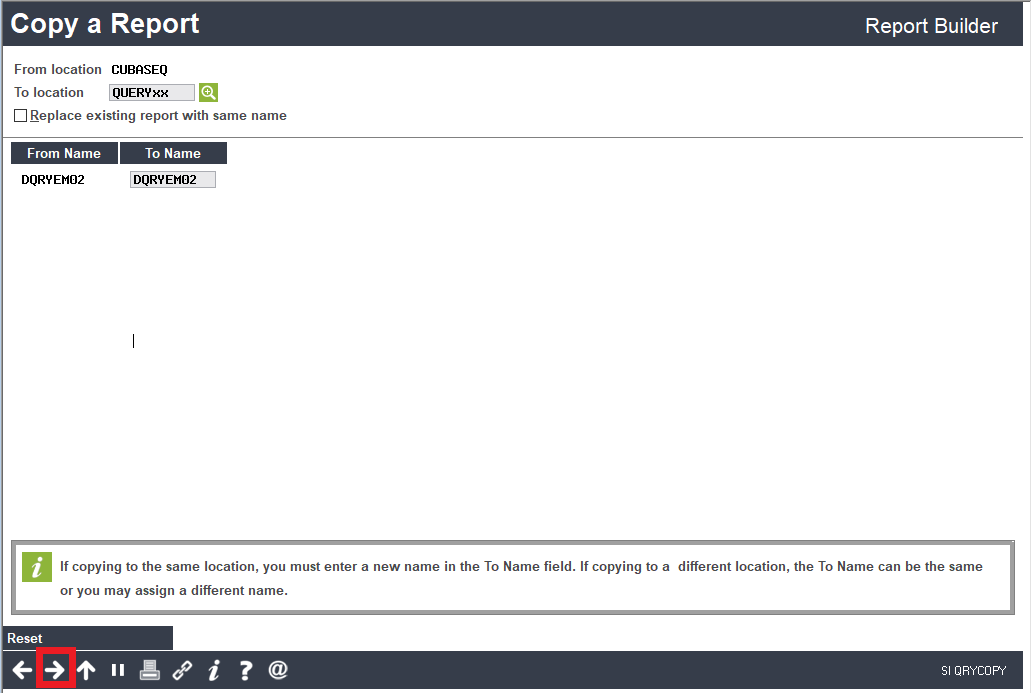
10. Click the forward arrow to copy the Query
Steps to View and Edit the Query
1. After copying the Query, you will return to the Choose Report screen where CUBASEQ will still be displayed in the Library field. Change this to your QUERYxx library.
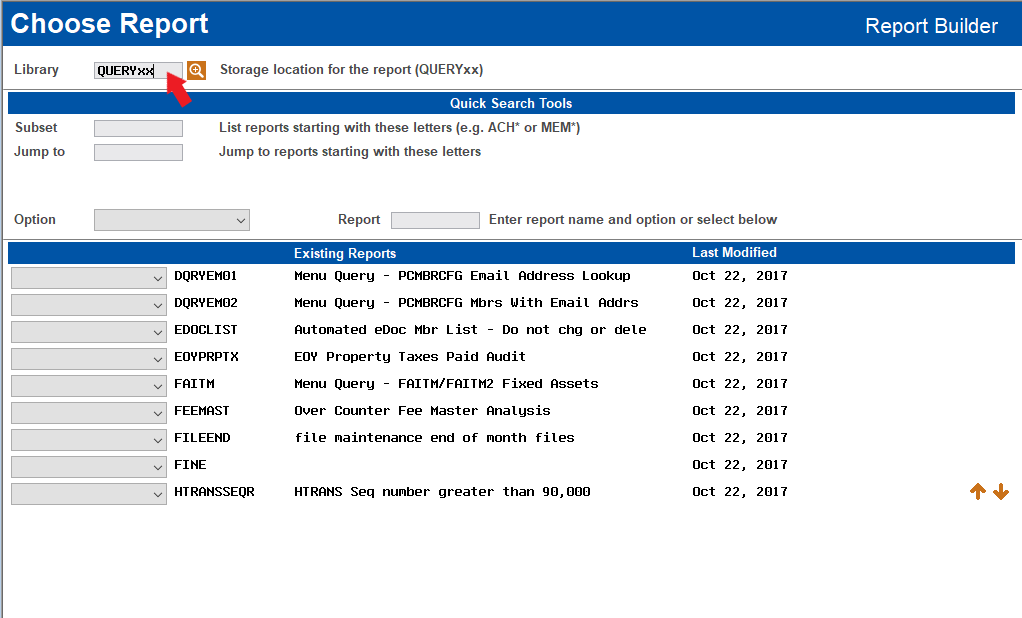
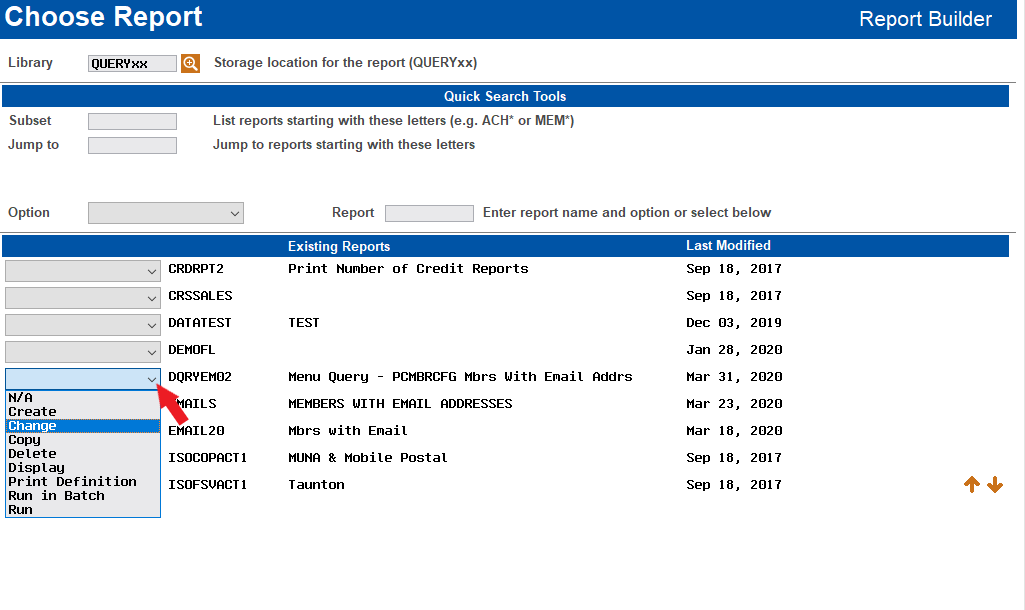
2. Locate your copied Query
- You can scroll through the list to find the Query by using the up/down arrows or enter the Query name in the Jump to field
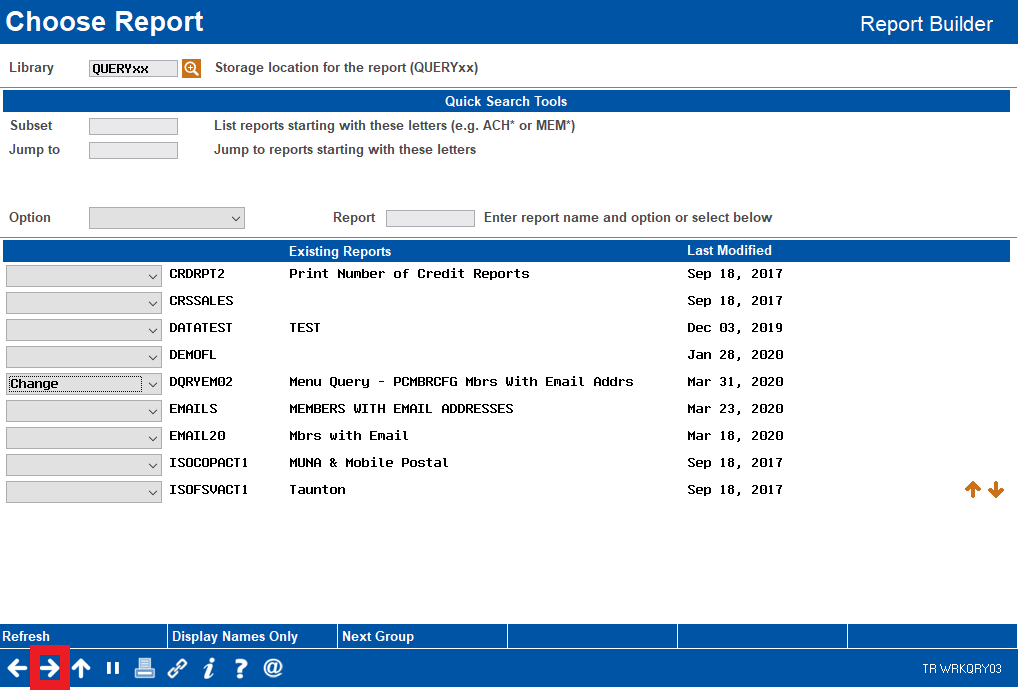
3. Using the drop-down menu beside the name of the Query, select 'Change'
4. Click the forward arrow
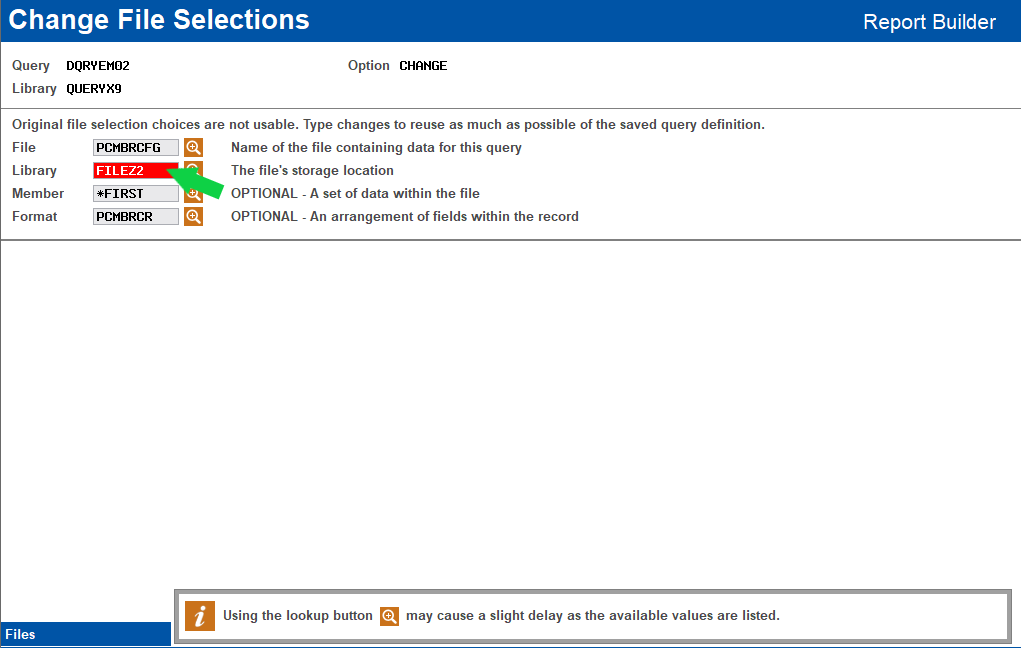
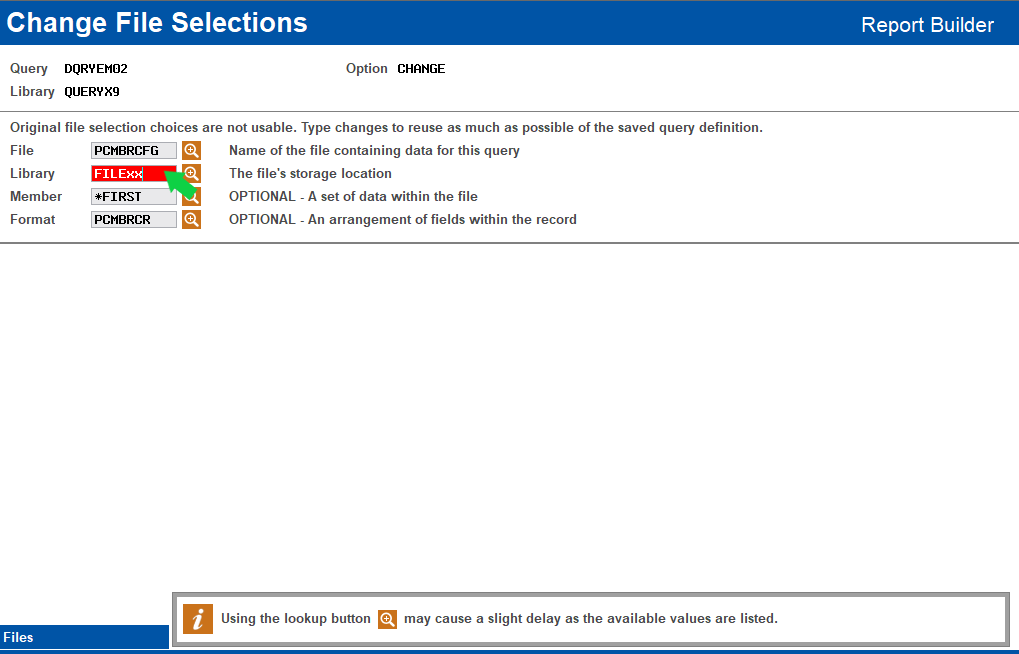
5. On the Change File Selections screen, in the Location field, enter FILExx in place of FILEZ2
6. Click the forward arrow
6. On the Report Builder - Main Menu screen, click Preview Report to view the report
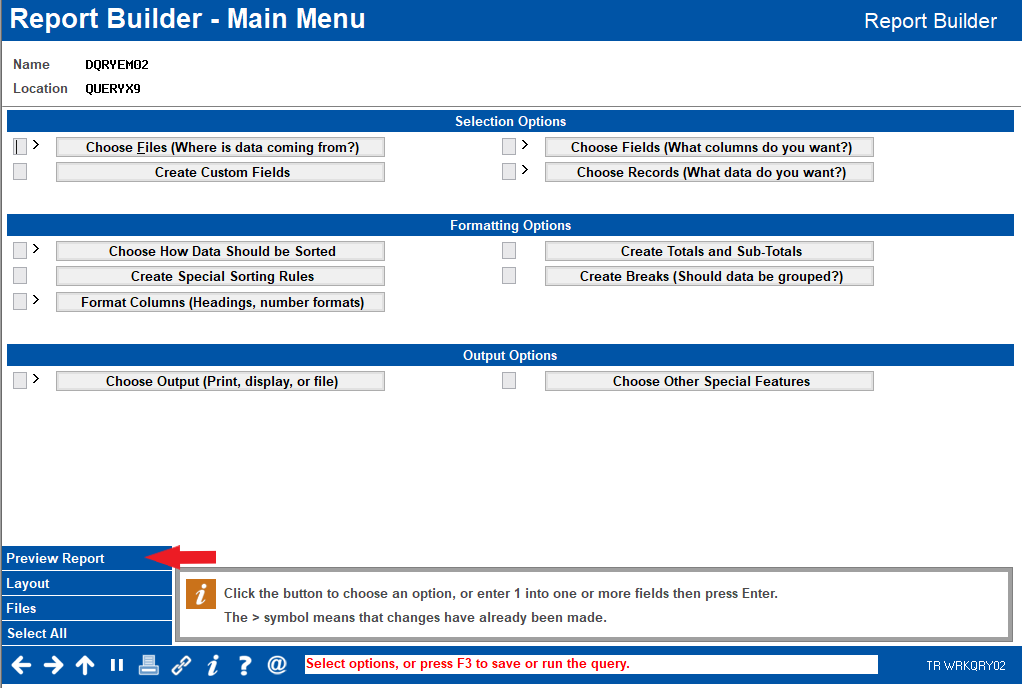
7. Click Choose fields (What columns do you want?) to modify or reorder which fields you would like to be displayed on the report, if desired
7. Click Choose Output to send this to a database file, processed discussed on pages 6-7 in reference guide listed below
8. When you are finished viewing the report and making any modifications, click F3 to run the report 'Interactively' which will generate the database file to be exported.
When you are ready, you can download and export the Query using Tool # 1375: Data Transfers (Upload or Download).
- See pages 6-7 and 10-13 of the File Transfers Downloading Data from iSeries to PC Reference Guide for complete instructions on preparing your query for export and downloading the query
Additional Resources
- Copy a Canned Query
- Edit Query Options
- Select Query Fields
- Save or Run Query
- Print Query Results
- File Transfers Downloading Data from iSeries to PC Reference Guide
Comments
0 comments
Article is closed for comments.